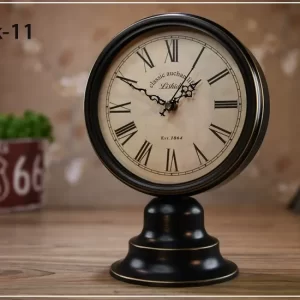
Why You Shouldn’t Hang a Clock Without Drilling Holes
By MantelClock Studios
When you want to hang a clock on your wall, you may feel that drilling holes is an unnecessary or undesirable step for a number of reasons. Maybe your landlord forbids it, maybe you have an impenetrable brick wall, or maybe you live in a protected building where the walls cannot be altered. Maybe you just can’t believe that punching a hole in your wall won’t cause the end of the world (it won’t).
Whatever the reason, finding alternatives may sound appealing at first, but these methods can easily lead to disaster. Imagine your beloved clock falling to the floor, whether it’s a family heirloom or an expensive piece of decor , and this guide from MantelClock Studio will explain why alternatives to drilling holes aren’t ideal, explore some of the common pitfalls, and show you how to safely hang your clock to avoid damage.
-
Elegant Black Mantel Clock for Living Room – Silent & Stylish
Original price was: $180.00.$170.00Current price is: $170.00.
Why sticky hooks are flawed
Sticky hooks may sound like a quick solution, but they often fail to hang clocks reliably. Here’s why:
-
Weight Limit: Most sticky hooks have strict weight limits and cannot hold heavier clocks. Even when multiple hooks or tapes are used to “increase” the weight capacity, the uneven distribution of the clock’s weight often results in one strip of tape being overstressed and failing.
-
Adhesive deterioration: Over time, changes in temperature and humidity can weaken the adhesive and make it unreliable. The longer a wall clock hangs on the wall, the greater the risk of it falling off.
-
Incorrect Positioning: Many adhesive hooks force your wall clock to tilt instead of hugging the wall. This affects the functioning of wall clocks – especially pendulum or mechanical clocks – and can even cause them to stop working altogether.
-
Damage to paint: Adhesive hooks often promise to be “easy to remove,” but the reality often doesn’t live up to the promise. Peeling off the adhesive tape can strip off a chunk of paint and leave an unsightly mark on the wall.
While lightweight, battery-powered clocks can occasionally use sticky hooks, MantelClock Studio strongly advises against them as a long-term solution.
Why Liquid Nail Glue is Not the Answer
Some people even go so far as to use liquid nails or construction-grade adhesives to mount their clocks without drilling holes. While this method may seem long-lasting and durable, it is not practical and cannot be recovered.
Using liquid nails can permanently secure the clock to the wall, but then it’s not feasible to replace the batteries, make repairs, or perform maintenance without destroying the clock or the wall. This method sacrifices flexibility for convenience and we at MantelClock Studio recommend avoiding it altogether.
Why screwing (into studs) is the best option
Clocks vary in size, weight and value, and many have a monumental significance, such as antique clocks that have been passed down through generations. For heavy clocks with glass mirrors, metal parts or pendulums, it’s vital to ensure their safety.
The safest and most secure way to hang a clock is by drilling a 50mm screw directly into a stud or in-wall batten (structural timber strip in a wall). This method ensures that your wall clock will be snug, solid and secure against the wall and will not fall.
Why a 50 mm screw?
The length of the screw ensures that proper support is provided:
- 12. Plasterboard thickness of 5mm
- 15-20mm for screws sticking out long enough for hanging
- 15-20mm to penetrate deeper into the studs for maximum grip
Longer screws (up to 75mm long) are fine, but 50-75mm provides the best balance of safety and practicality.
Step-by-step instructions: How to hang a clock
To hang your clock correctly, follow these steps:
-
Find the studs: Use a stud locator to find the position of the studs. If you are confident, try tapping on the wall to hear the difference in sound between hollow and solid wood, but a stud locator is more reliable.
-
Drill at an angle: Drill the screws upward at a 10-degree angle. This ensures that the clock rests firmly against the wall and reduces the risk of slipping. Avoid unthreaded screws near the shank of the screw and opt for fully threaded screws for better grip. Wall Clock: Use the special hooks on the back of the clock to securely fasten the clock to the screws. Make sure the clock is pressed against the wall and that the “12 o’clock” is at the top.
-
Wall clock: Use the special hooks on the back of the clock to hang it securely on the screws. Make sure the clock is pressed against the wall and that the “12 o’clock” is at the top.
What to do if there are no studs
If there are no studs in the ideal position for your wall clock, you can try the following alternatives:
- Move it slightly: Move the clock slightly to the left or right to align it with a nearby stud.
- Use a backboard: for heavier clocks, use multiple drywall anchors to secure a decorative or hidden wood backboard to the wall, and then secure the clock to the backboard.
- Plasterboard Fixing: For lightweight clocks, self-drilling plasterboard plugs or other wall fixtures will work, but caution is required. These fixings are often less reliable due to the additional stresses associated with running a mechanical or winding clock for long periods of time.
For mechanical clocks , MantelClock Studio strongly recommends the use of a sturdy backboard for added durability.
One final point.
At MantelClock Studio, we know how important your wall clock is – whether it’s a prized heirloom or a stylish design piece. While alternatives to drilling holes may seem appealing, they often compromise the security of your wall clock and the integrity of your walls. By using screws and locating studs, you can ensure that your wall clock is properly secured and becomes a timeless addition to your home.
Want more tips and expert advice? Subscribe to our mailing list and don’t miss any updates!


